Explanation of FileZilla home screen
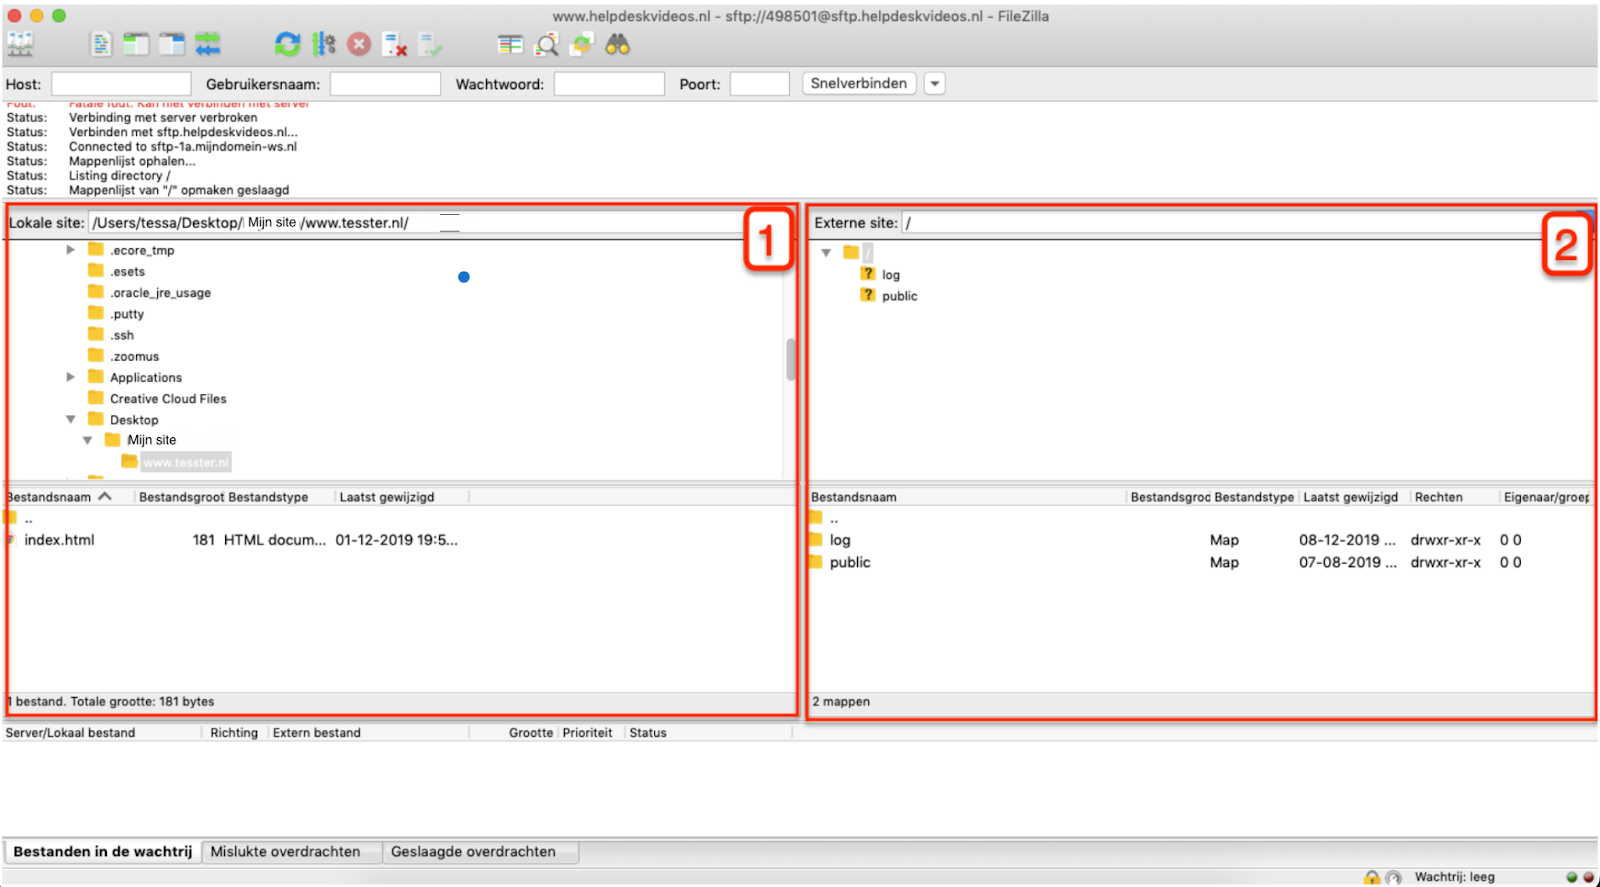
After you log in to FileZilla, you will see the screen below.
In the left part of your screen (1) you will see a browser window with the folders and files that are local to your computer.
In the right part of your screen (2) you will see a browser window with the folders and files that are on our web server, under your account.
How to upload your website with FileZilla
To upload your website, you will need to copy the website files from your computer to the /public/sites/www.yourdomainname.ext/ folder on our web server.
To do this, follow these steps:
- Go to the FileZilla home screen.
- In the right pane, double-click the public folder.
- Double-click the Sites folder.
- You will now see a folder with your domain name as the name. If you have 1 hosting package, you will see 1 folder here. If you have multiple Web hosting packages, you will see multiple folders.
The following video shows how to navigate to the correct folder from the FileZilla home screen using the steps above:
The final step is to upload your website files to our server. You simply do this by dragging the website files from the left window (your computer) to the right window (our web server).
In the video below, we show how to upload an index.html file from your computer to our web server. An index.html file is the main file of your website, or the home page, so do not forget it.
If after uploading your website, it is not working, check if all the files were transferred and if index.html or .htaccess are missing, for example.